Frames are meant for displaying important photos and pieces of art. So while getting every little detail right on the front of the frame is important, as nobody wants a piece that looks unappealing, the parts that you don’t see are just as pertinent. This is, of course, the hanging hardware. It goes on the back of the frame, and you never see it once you hang your frame. But where would you be without it? Well, you’d have a frame that isn’t hanging on the wall, that’s where!
While you might not think much about your picture frame hardware, this is quite a lot to know, plus you want to make sure that your hanging hardware is good quality and built to hold your frame up for years to come. Questions you may have are: What is the difference between sawtooth hangers and a hanging wire, how do you attach the hanging hardware, and what you will get when you order a frame from Frame It Easy? Today, we are going to go over all the questions you may have, to ease any worries you have before ordering a custom frame from us!
To make sure you know exactly what everything does on the back of your frame — and what to call it — our guide below showcases all the hardware you might encounter for both wood and metal picture frames.
Metal Picture Frame Hanging Hardware
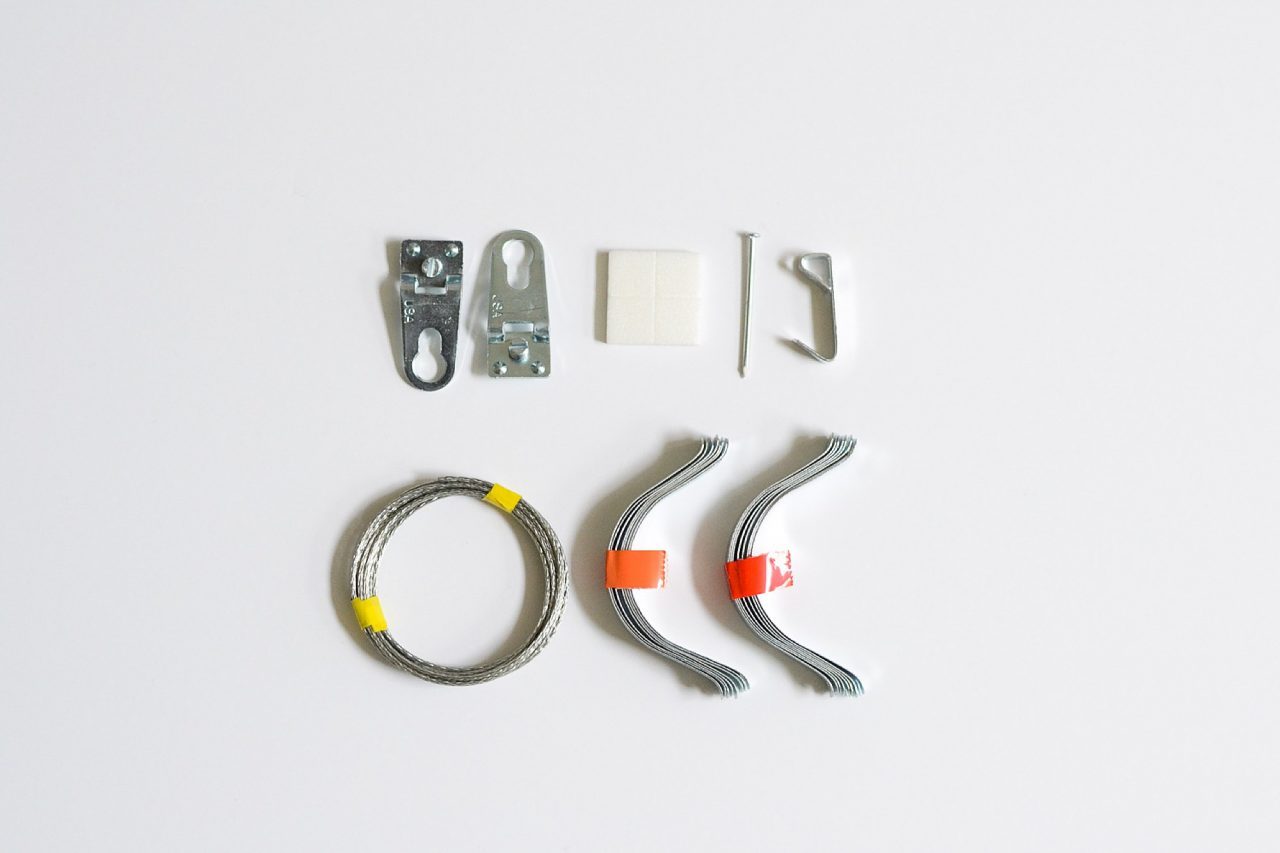
Our metal frames are made of aluminum. They come either anodized or powder coated, and they are four separate rails that aren’t bound together. As such, other hardware (which we’ll get into below) is needed to hold the metal frames together that isn’t necessary on our wood frames.
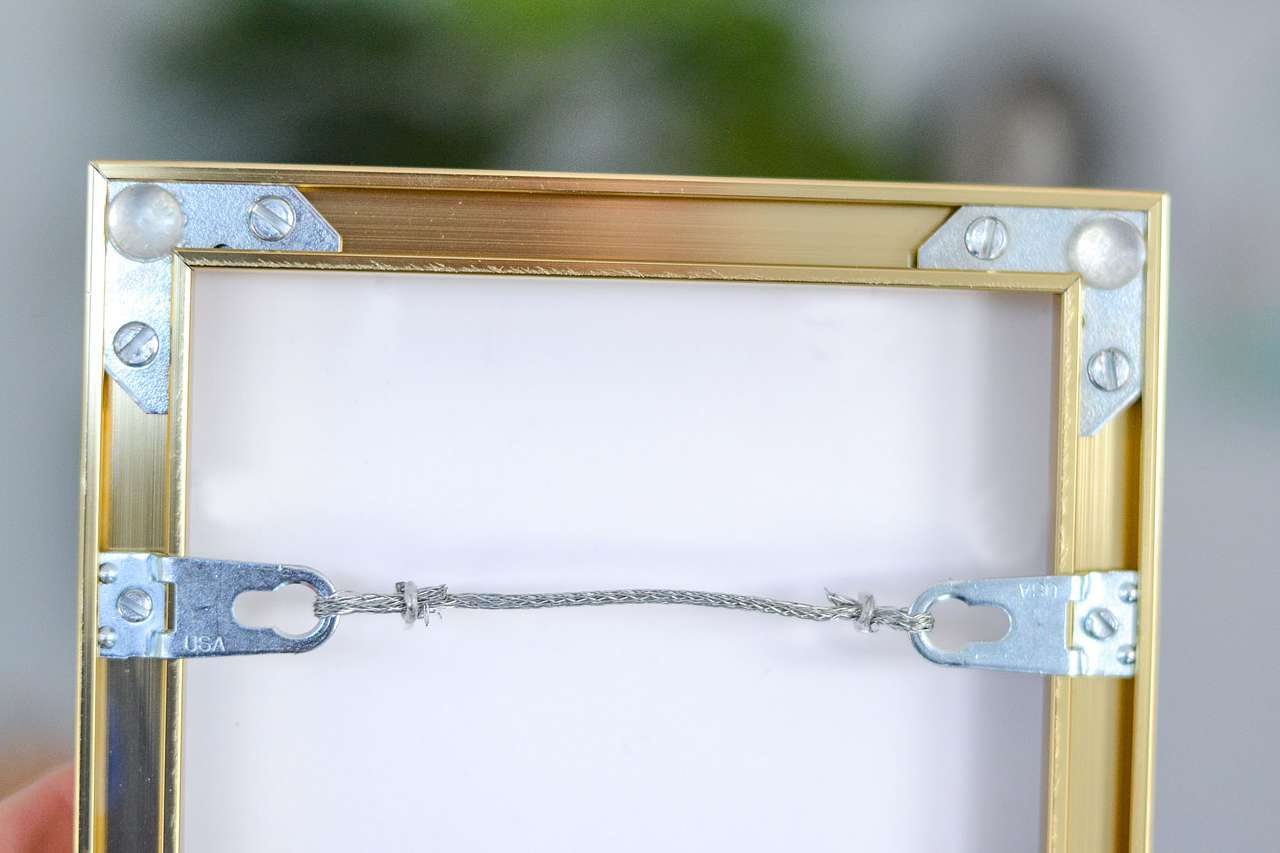
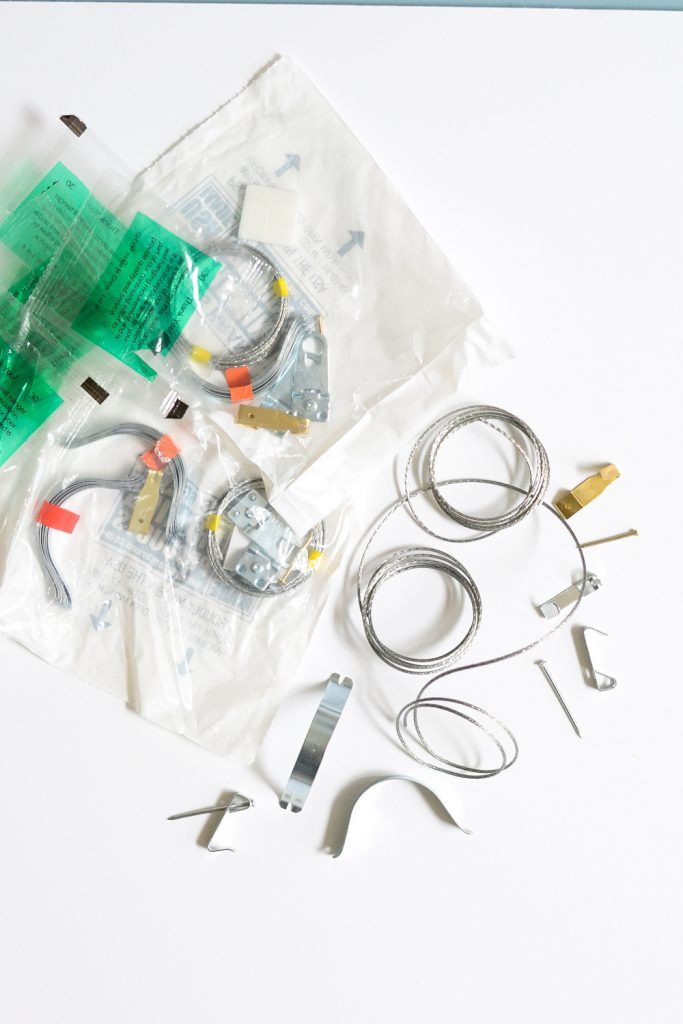
Most of our metal frame hardware can be adjusted (even once on your frame) and comes pre-packed in a small bag. So, it’s easy to add to each package or send a replacement, if ever necessary.
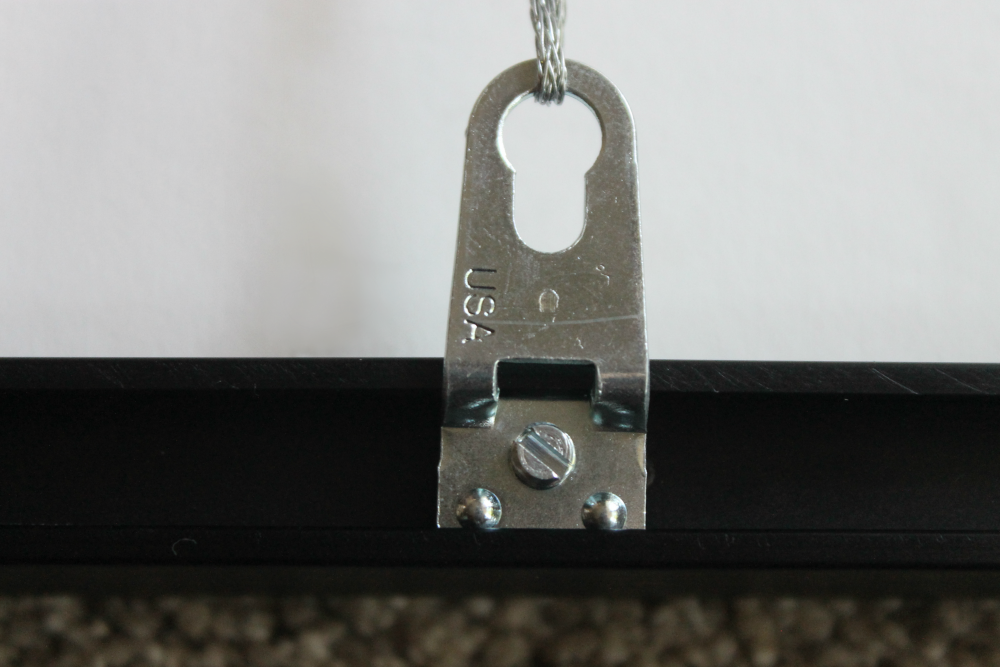
- Euro Hangers are what keeps your hanging wire in place. They fasten to the back of the frame, and hanging wire should be strung tight through each side to ensure an even display. You should also ensure that your Euro Hangers are placed evenly on both sides of the frame.
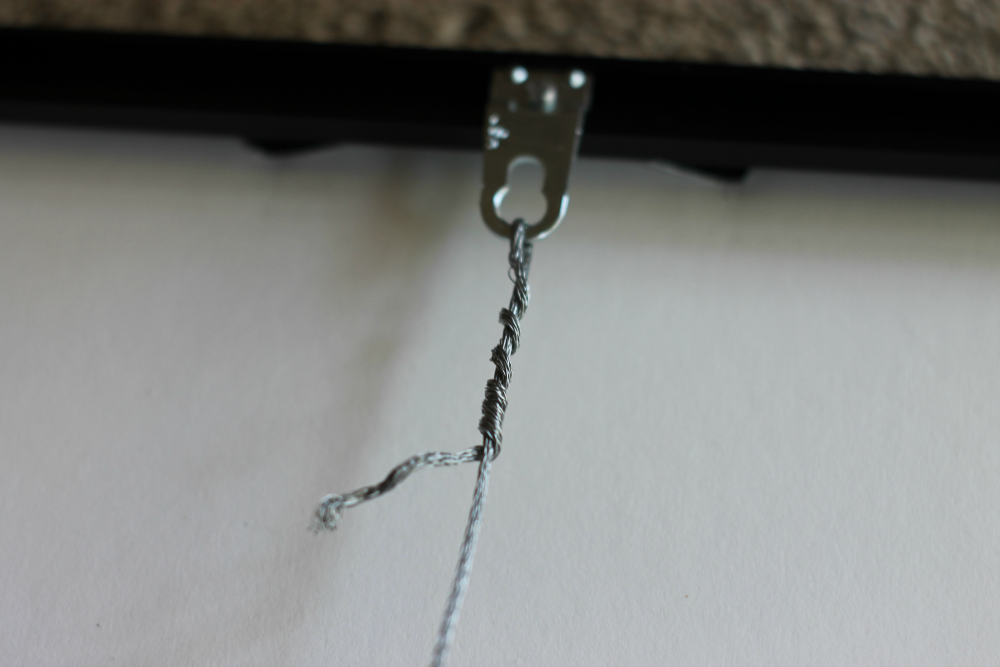
- Hanging Wire holds your frame to the hook that is on the wall. It should be taut in between both Euro Hangers, and it should be placed on a hook until the frame looks even.
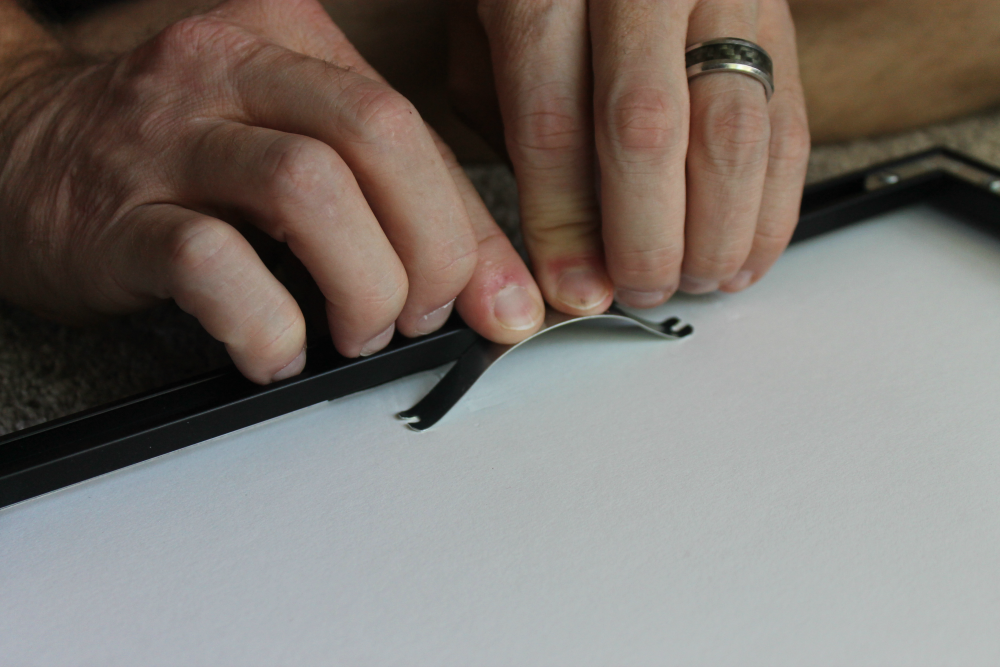
- Spring Clips ensure there is no space for your backing to move in the frame. Without them, there would be a slight bit of wiggle room for the frame’s contents to move around, and we want to make sure it stays snug. Simply place some pressure on the spring clips into the back of the frame to flatten them out, and this will remedy that issue. (Just be careful as if you let go without them being fully under the frame rail, they could spring out!)
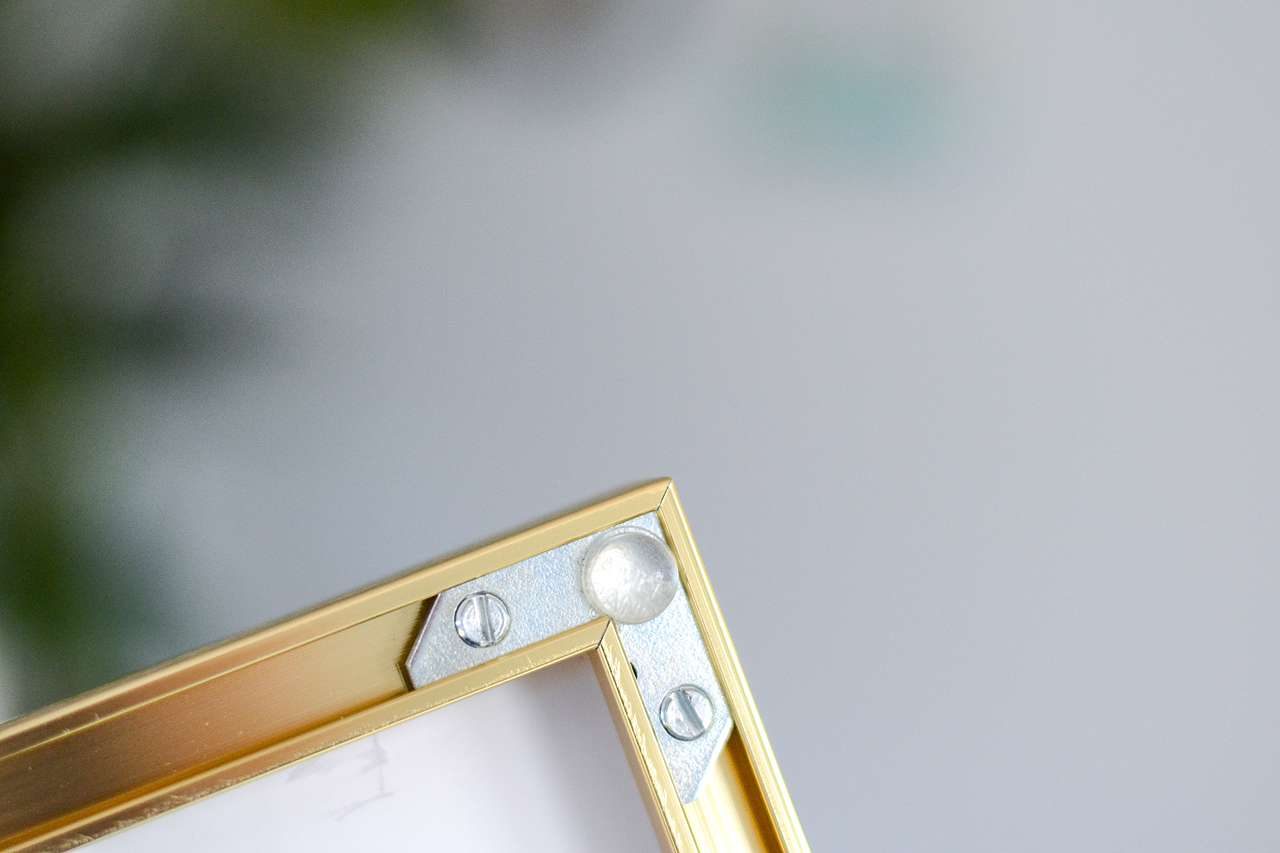
- Bumpers are meant to protect your wall more than your frame. Put the bumpers on the back corners of the metal frame to preserve your wall just as well as the frame you have preserves your artwork. (Note: sometimes these might be white foam squares instead of clear circles, but both are used the same and serve the same purpose.)
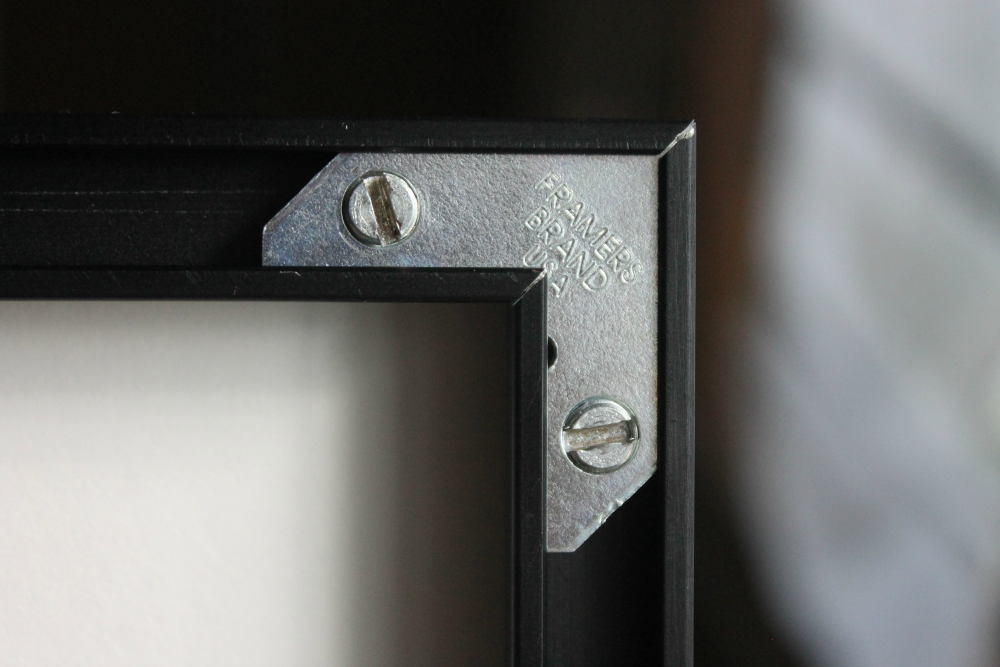
- Corner Brackets are what keep your metal frame together. As the name suggests, they are on the corners of your frame, and you can simply loosen or tighten to disassemble or assemble the frame. Something to note, however: You don’t need to remove the corner brackets entirely to loosen a frame rail. All you need to do is loosen them a little bit, about a half turn.
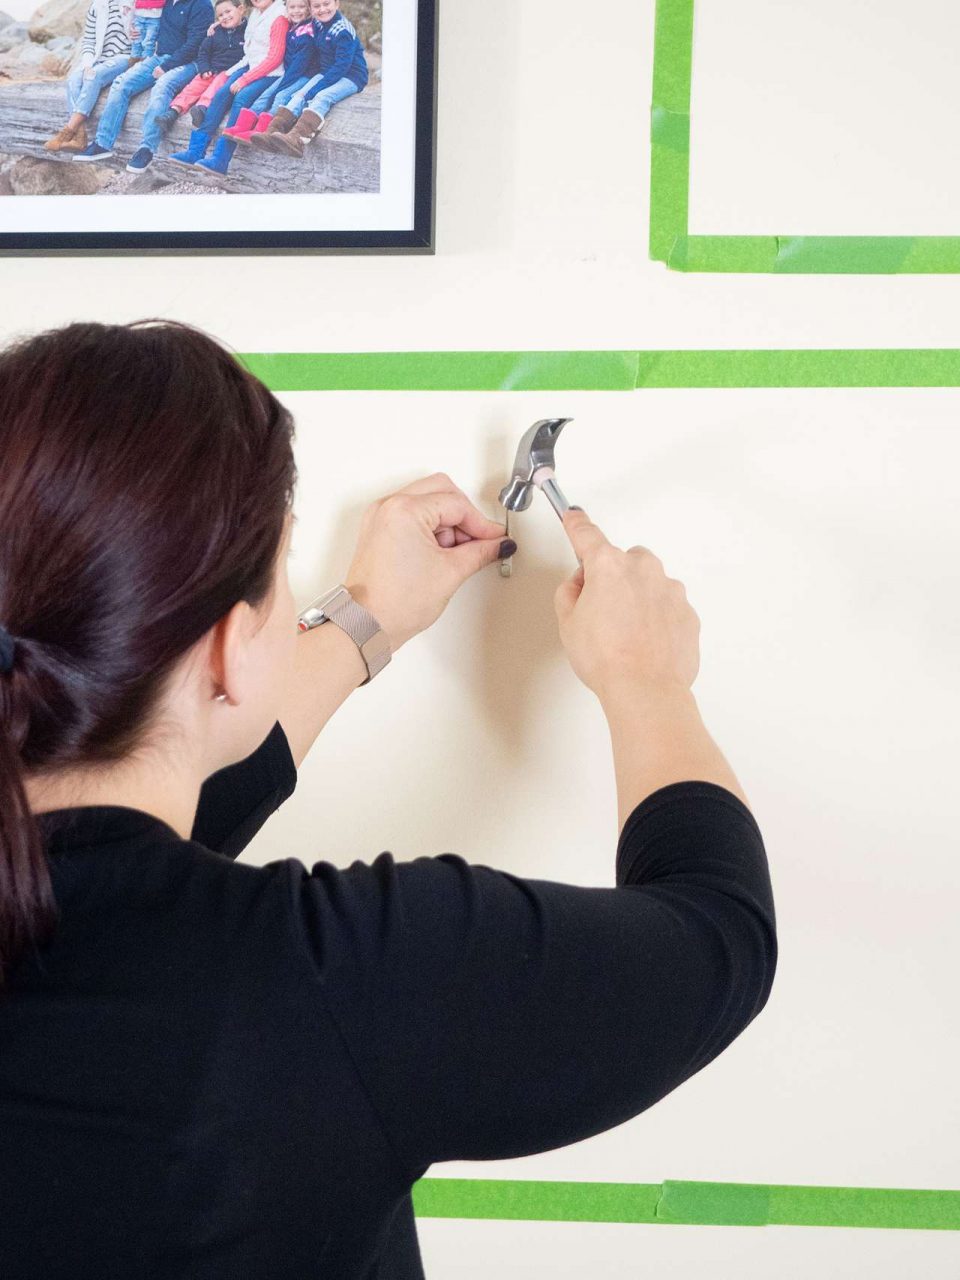
- Hook is what you mount on the wall for the frame to hang off of. Just make sure everything is level, and you should have a great display!
- Nail is what holds your hook in place on the wall. All you need to do is make sure you’ve found the perfect spot to hang your frame, and then hammer the nail through the hole on the hook; you should be all set from there.
Wood Picture Frame Hanging Hardware
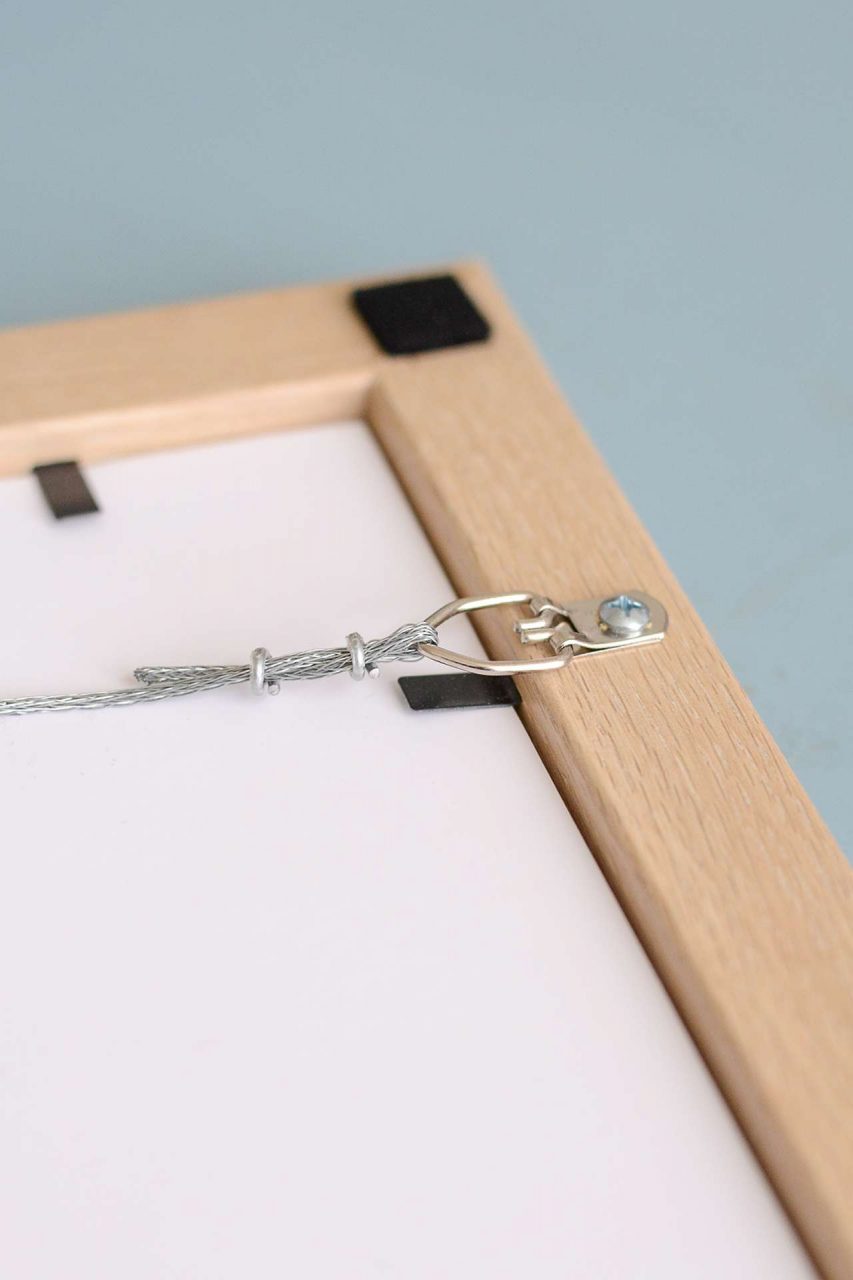
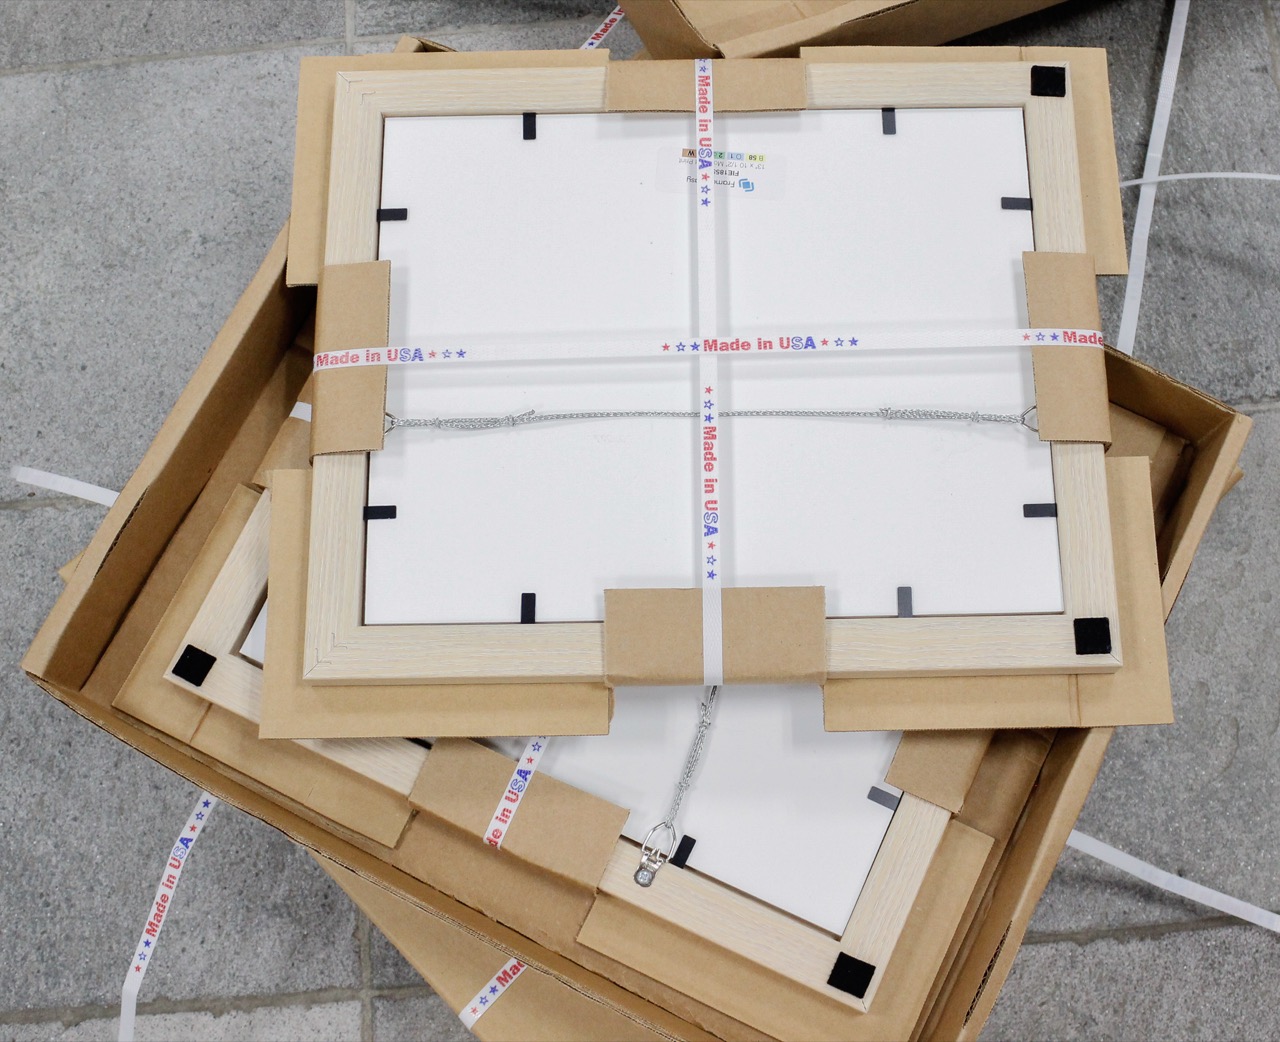
Our wood frames differ from metal frames in one key aspect: most of the hanging hardware comes pre-attached. We do this for a few reasons, the main one being that the hanging hardware on wood frames is more permanent once secured in place.
In addition, wood frames are bound together, which means that the rails are not individual, but rather one unit. The corners are detailed in such a way to give the look of one single frame, too.
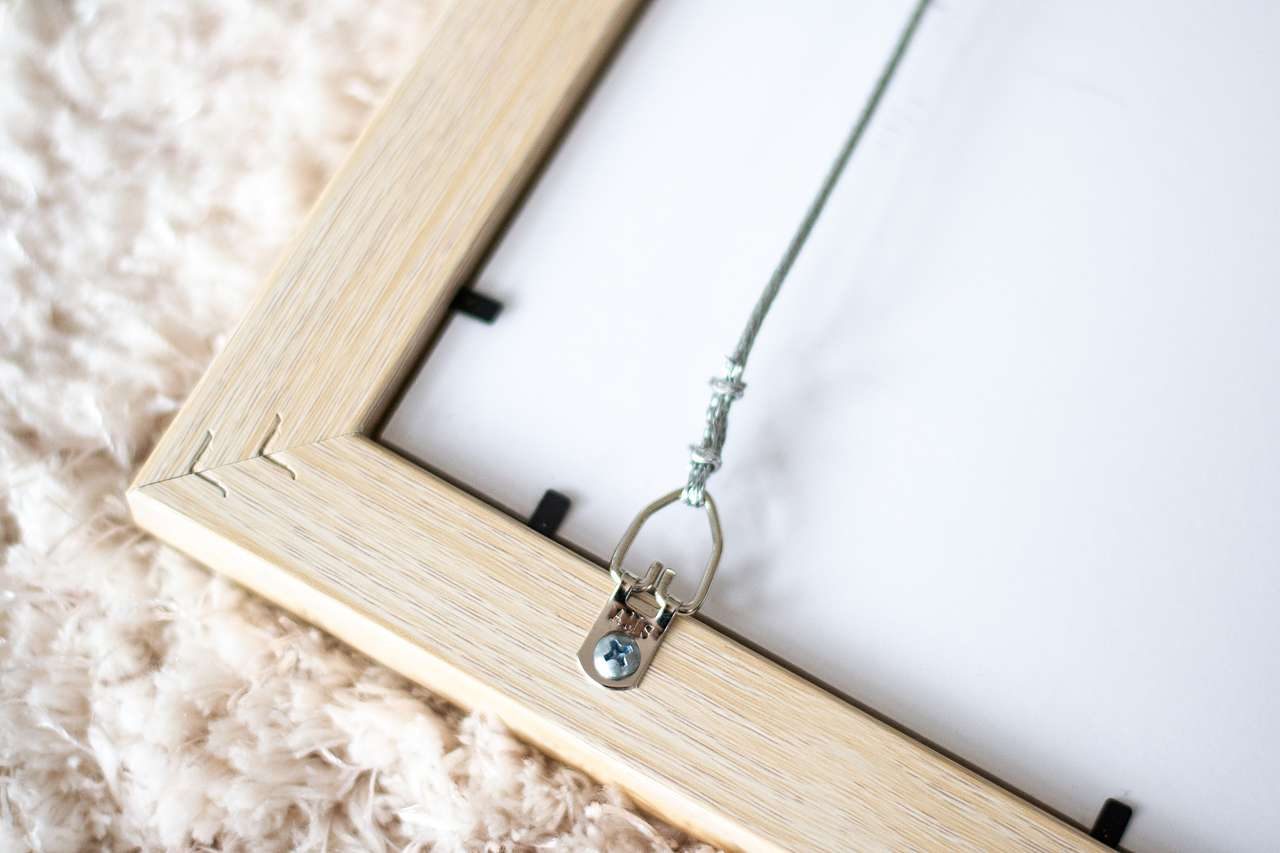
- D-Rings are the wood frame counterpart to Euro Hangers. They perform the same purpose, but for a different material. They come pre-fastened to the wood frame, since they are screwed directly into the frame profile.
- Hanging Wire used for wood frames is the same as the wire used for metal frames. The hanging wire comes pre-attached to the D-Rings, with one side untethered so you can easily remove the backing of your frame and place your artwork into it.
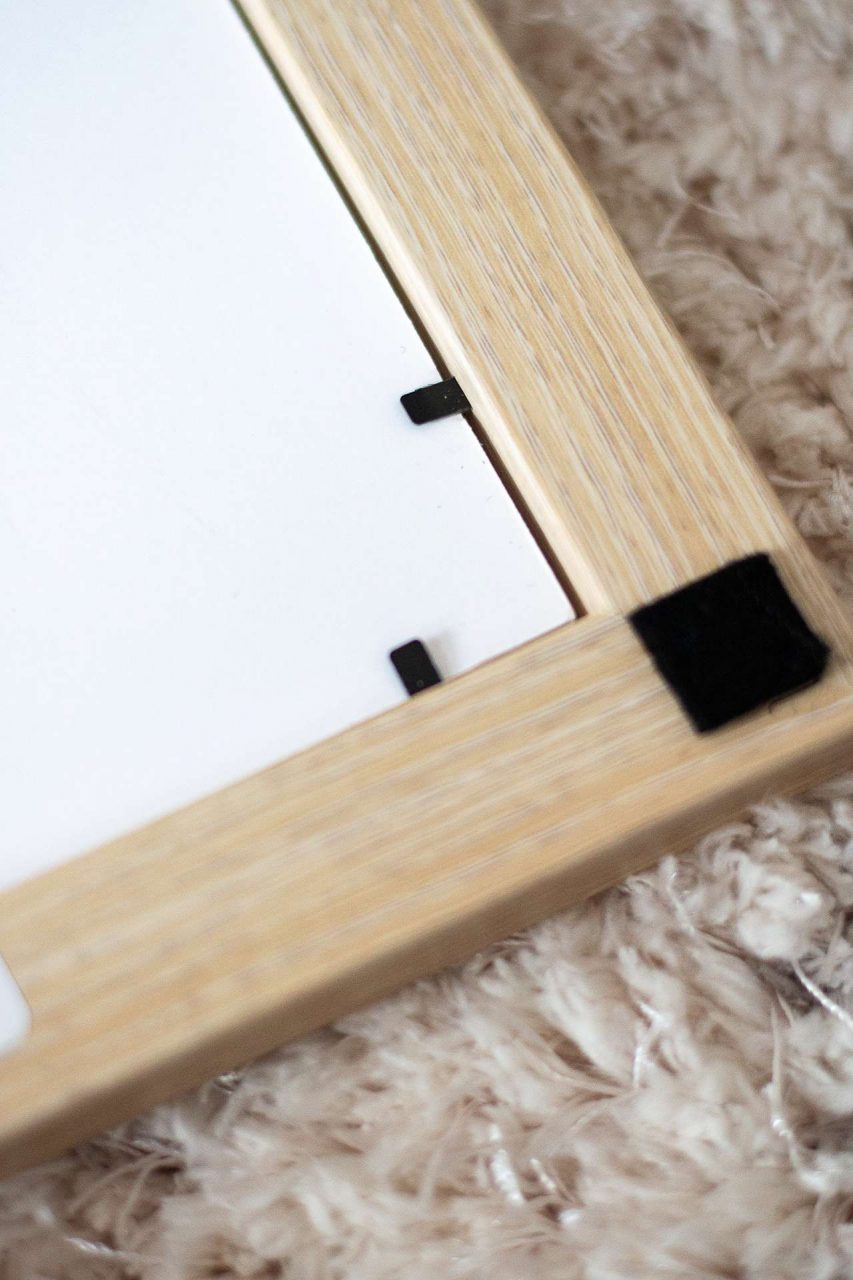
- Flexipoint Tabs come included on the back of our wood frames and are meant to be bent back to remove the backing from your frame, and then pushed back into place again once everything is placed in properly. These perform the same function as spring clips do for metal frames— keep everything in place and ensure nothing inside the frame can move or shake around.
- Felt Pads are added to the wood frame corners to protect your wall.
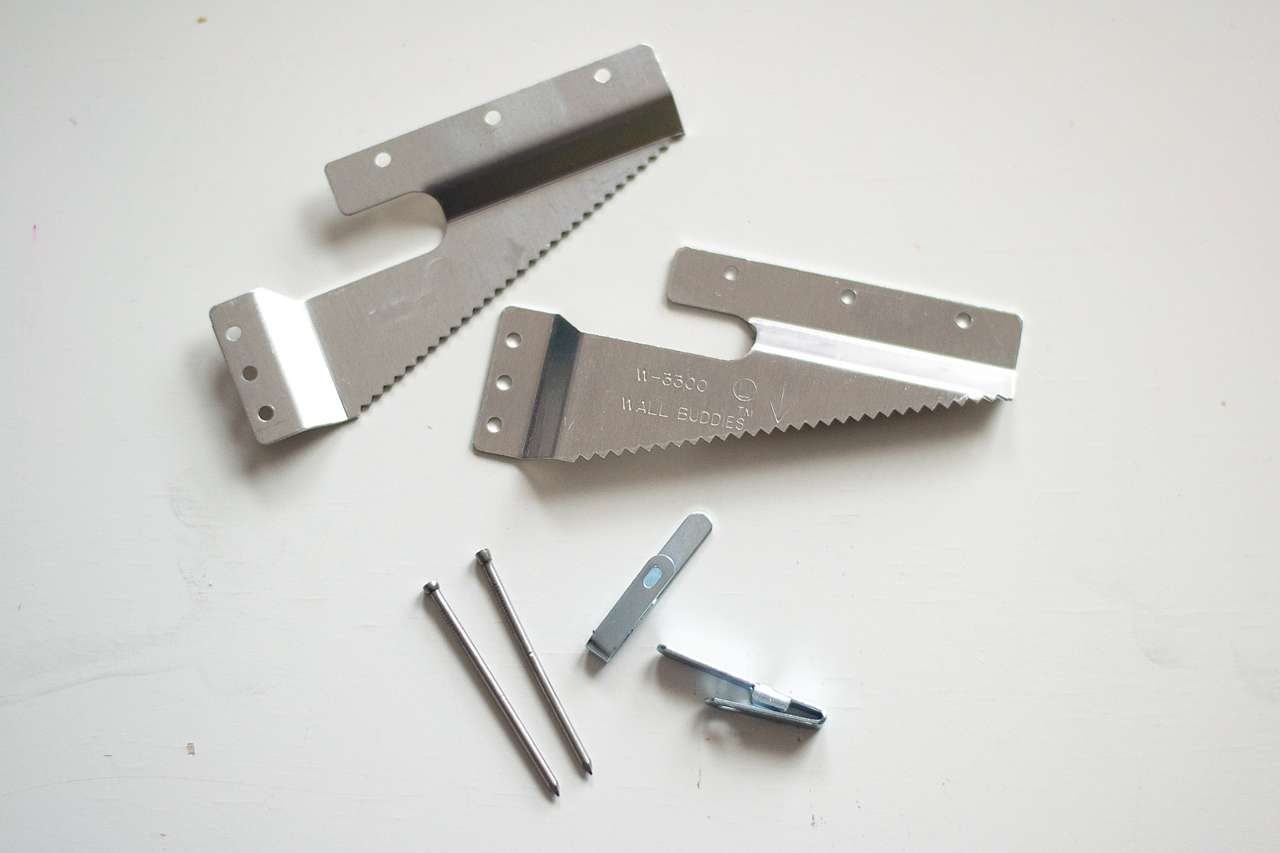
- Wall Buddies are for our larger wood frames to prevent them from bowing over time. (If you use hanging wire on a larger wood frame, the final product might warp and bow after a few months.) The Hanging Brackets are similar to sawtooth hangers— for those of you who may have prior knowledge of framing— these are placed on the corners of the frame, then attached to the nails & hooks.
*Smaller wood frames also come with a hook and nail.
Additional Accessories (Not Included With Standard Purchase & Completely Optional)
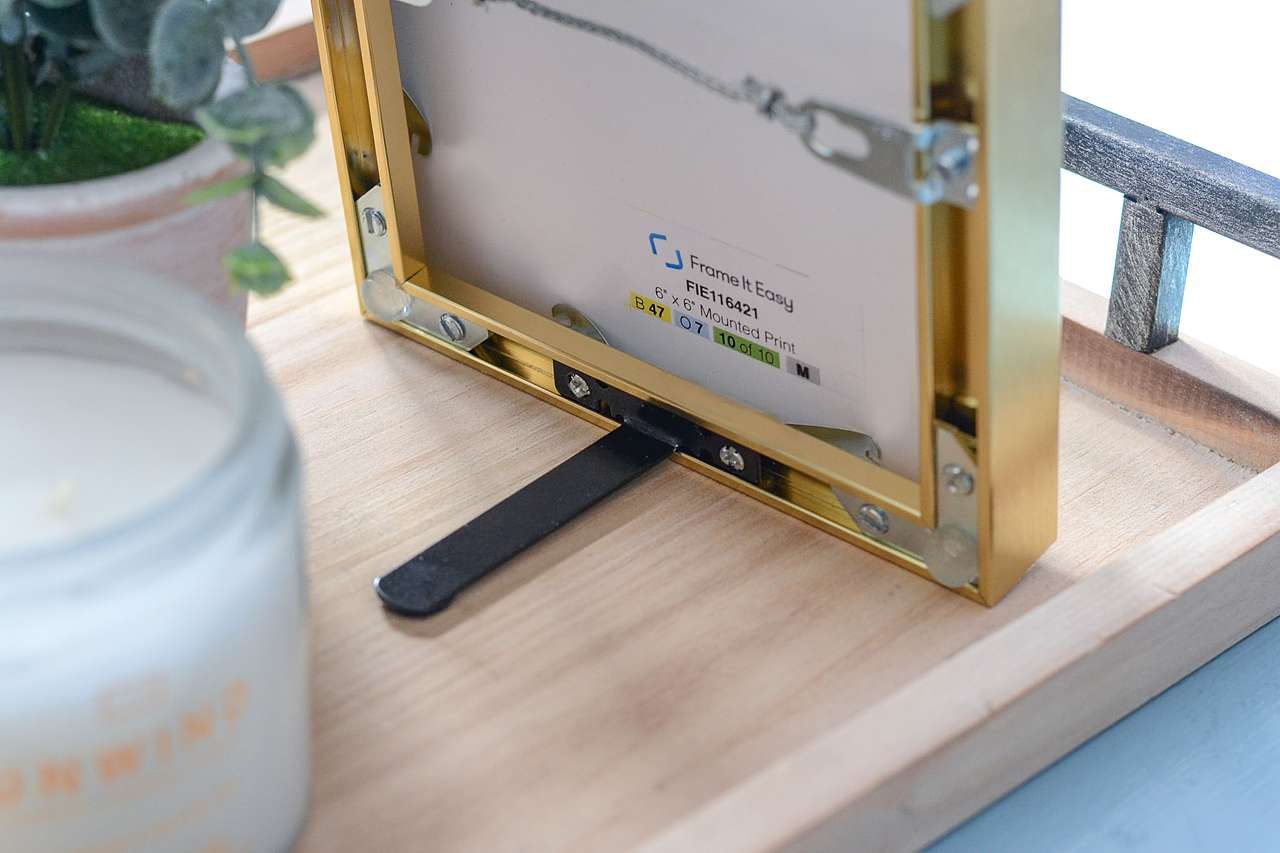
- EaselMates can be used to display your frames that have an opening of 13” X 19” or less on a tabletop. They are sold separately from standard orders and can be found on our picture frame accessories page.
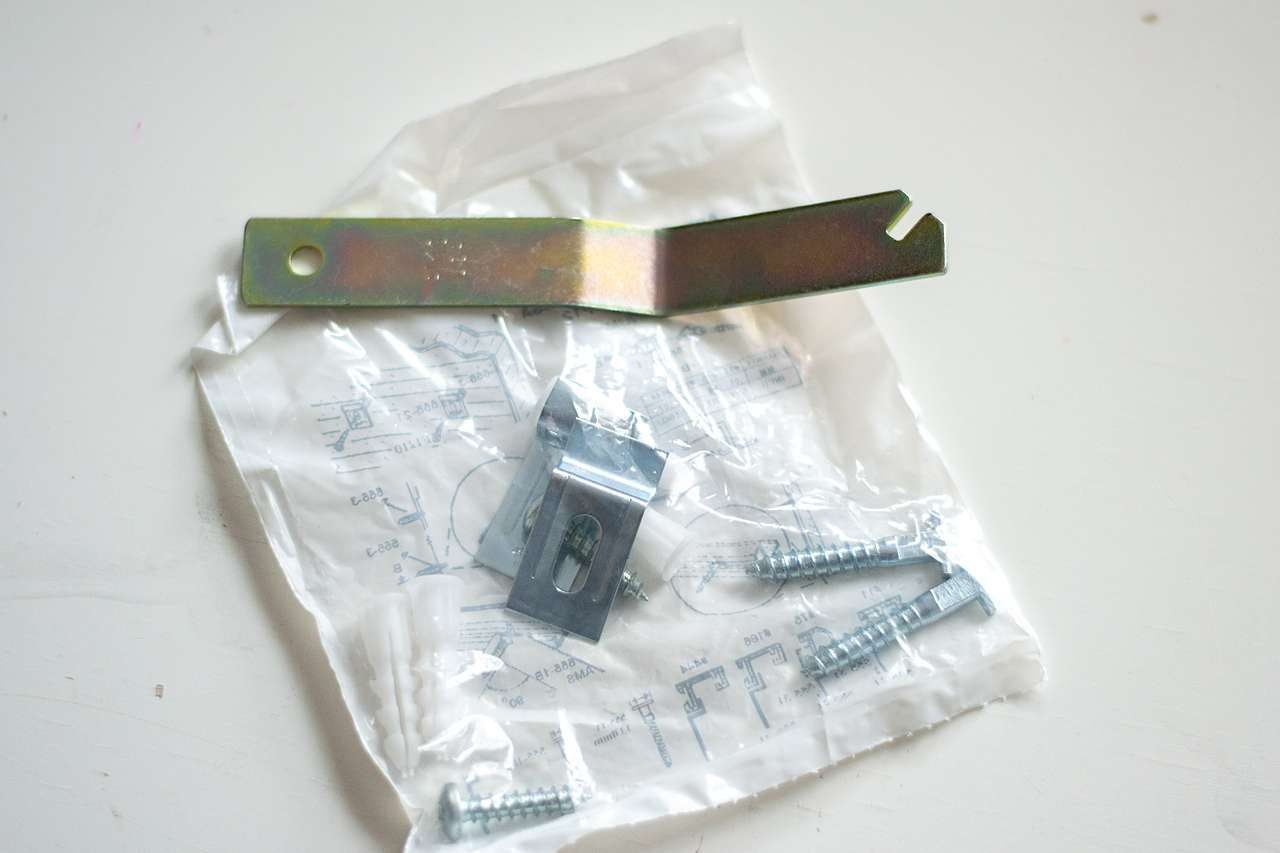
- Security Hardware is an optional add-on to any of our frames. It attaches frames to the wall at both the bottom and the top rails, for extra security when you don’t want your frames easily removed. The three types of security hanging hardware (for smaller metal frames, larger metal frames, and wood frames) can all be found on our picture frame accessories page.
Now, let’s go more in-depth between sawtooth hangers vs. wire hangers.
Sawtooth Vs. Wire Hang Framers
There are two main different types of wall-hanging mechanisms: sawtooth and wire hangers. The distinction can seem meaningless to some: Why would you put so much thought into a part of the frame that won’t be visible once you hang it on the wall?
Good question. But sometimes it’s the parts of the frame you don’t see that make the biggest difference. Wire and sawtooth hangers can serve different functions, and which exactly is right for your project can depend on the size of the frame.
Luckily, here at Frame It Easy, we make it, well, easy for you. We have a system that automatically dictates which type of hanger you get, and it all depends on the size and material of the frame. If you have a wood frame that’s over 30″ wide, you’ll be getting sawtooth hangers. For everything else, the wire hanger should do the trick. But let’s dive deeper into the differences between the two.
Sawtooth Hangers
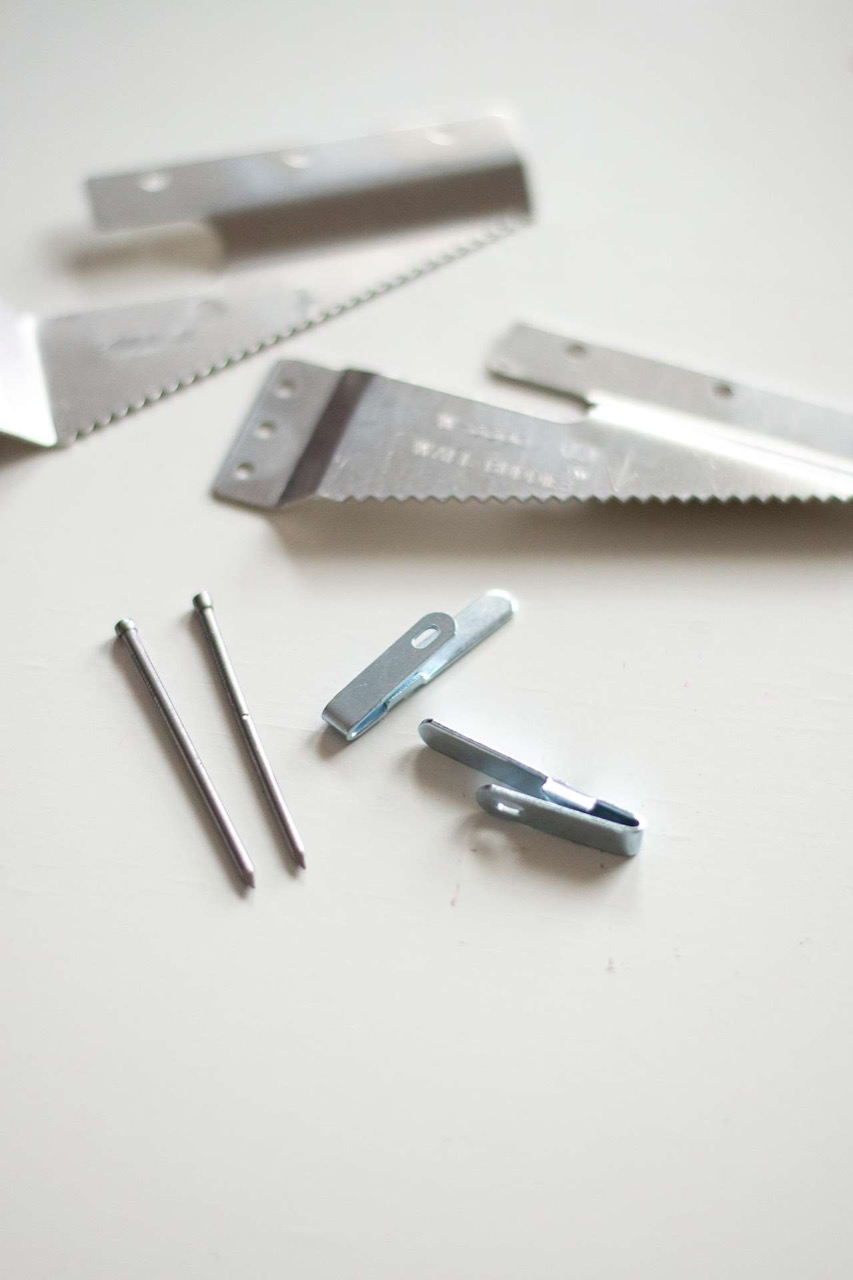
Sawtooth hangers are less conventional in the hanging world. Indeed, most people expect wire on the back of their frame. And if they receive sawtooth hangers instead, they might have some questions. That’s why we’re here, to help you out!
Here at Frame It Easy, we put sawtooth hangers on our wood frames of 30″ in width or more. This is to prevent bowing. Sawtooth hangers have some benefits, too. On top of them being more preventative of bowing, you also won’t have to adjust the frames to keep them level. Just make sure their corresponding wall buddies are aligned, and you should be all set.
That said, wires have their benefits, too. Let’s go over them.
Wire Hangers

This is the more traditional hanger, often preferred by art galleries and the like. Art galleries prefer them because they leave fewer holes in the wall since you will only need one to hang the wire on. Wires are often dependent on how secure they are to their corresponding D-rings.
Here at Frame It Easy, we test all framing hardware to be efficient and sturdy. This means that your hangers and rings that hold your wire should work great, so long as you assemble everything per the instructions sent with the frame! That said, we couldn’t speak for any hardware that isn’t directly from us.
Wire hangers also have the luxury of being easier to adjust. If you notice your frame isn’t quite level, you won’t have to worry about removing any nails from the wall, like you would with brackets. Instead, you would just need to move the wire along the hanger, until it’s level. A wire is also slightly easier to set up, with fewer tools needed, so that’s an advantage as well.
So, how do you add these hanging options to your frame? Let’s take a look…
How To Add Hanging Hardware To Our Frames
We can not inform you on how to add hanging hardware to frames that aren’t from our warehouse, so these instructions are solely for frames manufactured by Frame It Easy.
Wood Frames

With our wood frames, the hanging hardware comes pre-attached to the back, so you won’t have to worry about it.
That said, there are a few tips to keep in mind when ordering a wood frame from us: First, the hanging wire on the wood frames comes untethered on one side, if you don’t print your photo with us. This is to make removing the backing and inserting your art that much easier.
Once you add your art into the frame, simply replace the foamcore backing and push down the flexipoint tabs. Then, twist the wire around the untethered side until everything is taut. You should be all set from there!
One last thing, too, about wood frames. If you order a wood frame with a “Width” of over thirty inches, it will come with hanging brackets, not wire. This is to prevent bowing. So if you receive your wood frame and you don’t see any wire, don’t panic! Just place the corresponding wall buddies on the wall, and then hook the brackets over them. That will leave you with a great display.
Metal Frames

If you order a metal frame with no print, the hanging hardware will come in a separate baggie filled with everything you will need to attach when you receive it. This might sound intimidating. But don’t worry! It’s easy. You’ll only need a screwdriver.
The first thing you’ll need to do is remove a frame rail by unscrewing two parallel corner brackets. You don’t need to remove the screws from the bracket entirely, just loosen it until you can remove the frame rail.
From there, place your art flat against the foamcore backing and place the acrylic cover on top. Then you will be all set to slide the backing back into the frame rails and re-tighten the parallel corner brackets.
Now you’re ready to screw on the euro hangers and insert the spring clips. Once you do that, just string the wire between the hangers, and you will be all set!
Standing a Frame Up

If you are planning on creating a tabletop display, you won’t need to worry as much about the hanging hardware. For this, we sell “EaselMates” from our “Accessories” page. They will come separate from the frame, but just screw the accessory into the bottom of the frame when you receive your order, and you’ll be able to stand your frame on any flat surface. Our EaselMate works on any wood or metal frame styles up to 13”x19” that can be easily attached and adjusted to any angle.
Frame Kits Vs Custom Frames
Frame kits are exactly what they sound like — the bits and pieces you get that will result in a frame once put together. Frame kits can be great, and it certainly can lead to a long project — something to keep you engaged over a long period of time. Indeed, we often get questions about frame kits in our support inbox. However, we at Frame It Easy think you should be getting, well, a frame. When you open the box upon receiving your order, you should at least get an idea of what your order frame should look like when completed (i.e. when the art is inserted!).
This is why we don’t send frame kits, but a preassembled frame that will either only take a few easy steps to insert your art, or one that’s 100% put together and ready for display. Which one it is, of course, is dependent on if you order a print with your order or not. So what are the benefits of ordering a frame from us rather than a kit from someone else? Well, let’s have a look.
You See The Final Product as Soon as You Take It Out of the Box

You finally receive your frame, and the second you take it out of the box, you know what it will look like. That’s the key difference between ordering a frame versus a frame kit. Assembling a frame kit might take time, and you never know what the exact final product will look like until it’s finished. Preview photos and the like exist, but there’s nothing quite like seeing the final frame, in hand and fully assembled, and you didn’t have to break a sweat. This is what we do; ship you a complete frame that you’ll be able to see immediately.
There is a certain degree of professionalism, too, about having a full frame right off the bat, which leads us to our next point…
Professionally Assembled, Better Quality
We’re certainly not doubting your personal craftsmanship. If your niche is putting things together and working with tools, you could almost certainly put together a frame kit with the same level of proficiency as someone who does it for a living.
Or, you might not be as adept with a screwdriver, or the like. This might lead to problems on your end, but on our end, it’s easy! We specialize in making frames, so leave the full assembly work to us. No need to do it on your end!
You Save Time
We get it: You’re probably busy. Either with your job, with your family, or with both. This means that you probably don’t want to set hours aside to assemble a fully dismantled kit, just to get the same product as you would with one of our frames, which is a framed piece on your wall. This means less time spent hassling through tiny screws and nails, and enjoying the finished product.
Getting The Hang Of Things
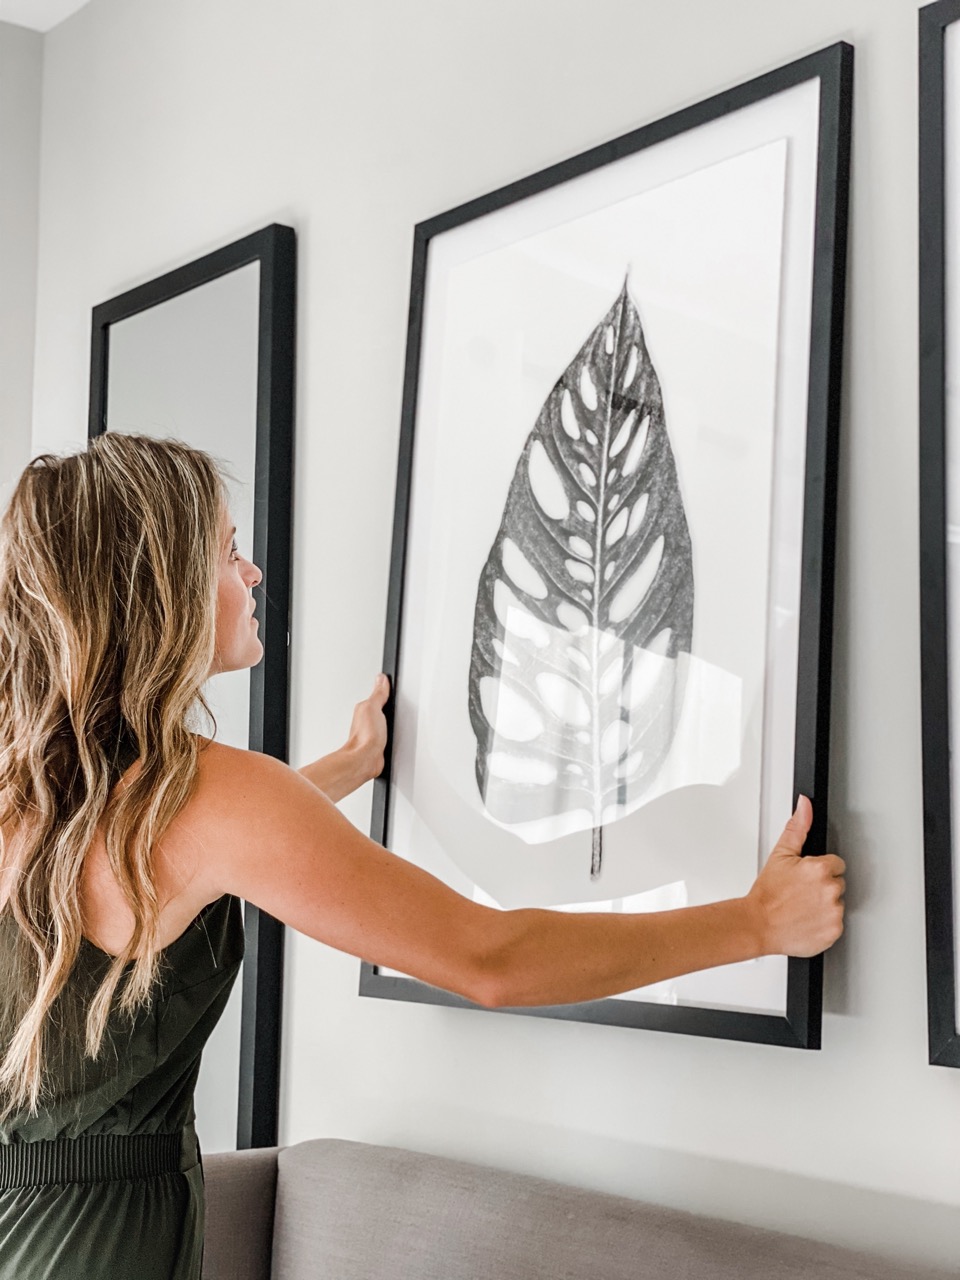
Hanging your frame up is the final part of your framing journey. It’s that final breath of satisfaction that you take after you measured everything out, secured some wall space, and assembled your frames. Hanging hardware, though, can make an impact on how your frame looks, even if you don’t see it once your frame is hanging — but the hanging hardware is very functional.
We think that frames should require minimal to no assembly, and the process should overall be, well, easy! That is exactly what you can expect when you order a custom frame from Frame It Easy. Our philosophy is simple, we want to save you time (and money) so you can experience life’s most frameable moments with your loved ones. When you order a custom frame from us, you will receive a fully assembled frame right to your doorstep. If you’ve uploaded your art to our site, we will print, mount, and frame it for you, all you need to do is make the hole in your wall. If you have your art at home, you will need to insert it yourself, but we’ve made that part easy, too. Check out our how-to-add art to frames guide for a little extra help!
Ready to start designing your custom frame? Head over to our Frame Designer to get started! And don’t forget to share your finished product with us on social media so we can see what you created. Happy framing!
