How To Measure Your Art For Framing: Measuring your art correctly is perhaps the most important step in the framing process — if the art size is off, the rest of the measurements for the frame, matting, cover, backing, etc. will also be off, and we don’t want that! *Even if your artwork or the artist claims it to be a certain size, you should always measure it yourself to confirm – just to make sure you receive a frame that fits perfectly.
How to Read a Ruler
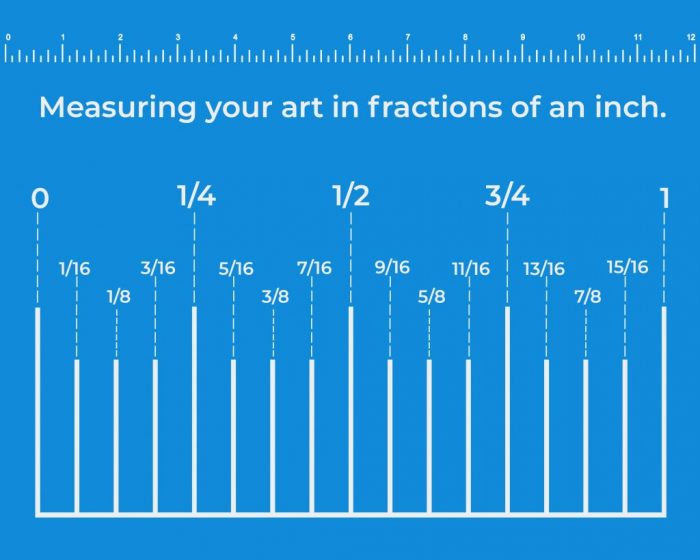
Some rulers have an English side– inches, feet, yards, etc.– and a metric side– millimeters, centimeters, meters, etc. The marks on a ruler all have different lengths because they denote different fractional increments.

On the English side, the longest ones mark each inch. The second to longest ones mark each half-inch; the third-longest mark each quarter-inch; the fourth-longest mark each eighth of an inch; and the fifth-longest mark each sixteenth of an inch. When lining up the ruler to your art, it’s important to line it up with the nearest fractional increment.
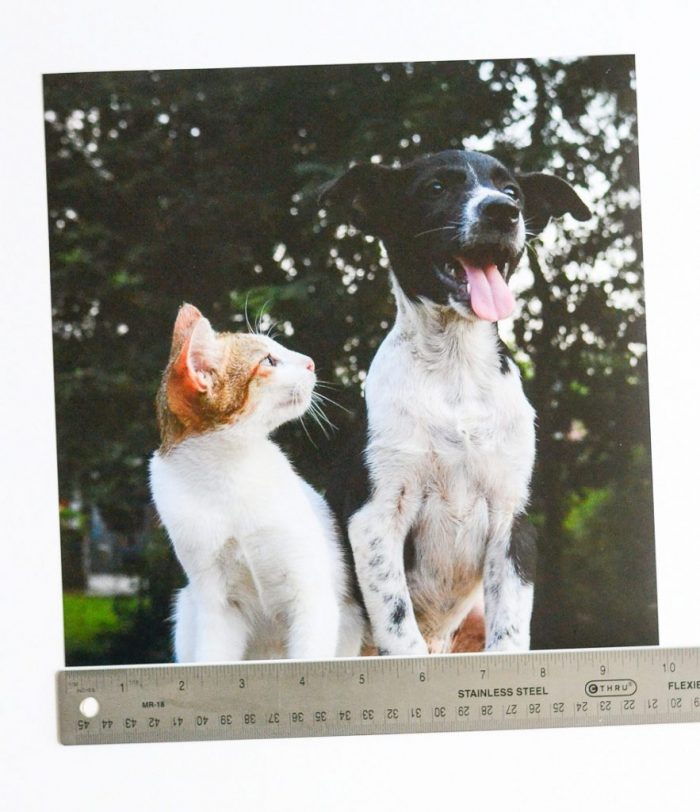
Once again keep in mind that this measurement will dictate the cut of the frame, backing, and acrylic, so it’s important to make it as precise as possible. Because of this, we strongly advise you use a standard, rigid measuring tape to measure your art, as flexible measuring tapes (such as ones used to measure fabric) may not be entirely accurate for measuring art and photography.
Millimeters (mm) vs. Centimeters (cm) vs. Inches (in)
In some cases, art or photos are measured using millimeters (mm) or centimeters (cm), both part of the metric system (an internationally recognized system of measurement).
1 in = 25.4 mm = 2.54 cm
Always make sure you know which unit of measurement you’re dealing with to make sure the results are accurate.
How To Measure Your Art For Framing: Here at Frame It Easy we use inches as our standard unit of measurement. For any art that is measured in increments other than inches, you’ll want to make sure you double-check and convert the numbers before entering your measurements into our frame designer.
How to Properly Measure Art

For art you already have, you should start by placing your art in the correct orientation of how you’d like to view it, then measure the width and height of your art, as well as its thickness.
Width = the horizontal measurement from left to right
Height = the vertical measurement top to bottom
*Thickness = the depth measurement from front to back
*For thickness, you should consider the following: If it’s over 1/4” thick, look for a framer that can create shadow box frames, which are great for wrapped canvas, 3D collectibles, and jerseys.
*For artwork thinner than 1/4”, a standard picture frame will likely suffice, and those are generally the easiest to find.
How To Measure Your Art For Framing: Here at Frame It Easy we can frame art from 5″x5″ up to 42″x62″. Our metal picture frames have room for artwork up to 1/4″ thick. (This includes matting, so if your frame has a single mat the artwork shouldn’t exceed 3/16″ thick and if it is double matted the artwork shouldn’t exceed 1/8″ thick.)
The spring clips that hold your art into the frame will adjust perfectly as long as your art doesn’t exceed this thickness.
Our wood picture frames have room for artwork up to 1/8″ thick if they have no mats or one mat, and up to 1/16″ if they have two mats.
Orientation: Portrait vs. Landscape

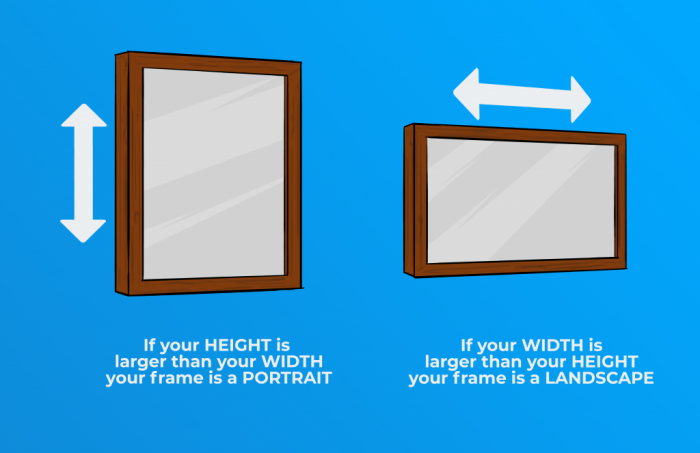
There are two different types of orientation to a frame; their technical names are portrait (vertical), and landscape (horizontal).
The orientation is dictated by which measurement has the greater value, and the standard format for denoting size is always width first, then height, or WxH.
For instance, a frame with the measurements of 8″ X 10″– the first number being “Width” and the second being “Height”– is a portrait.
For a frame with the same measurements, but a landscape orientation, you would go with 10″ X 8″– the greater number being assigned to the “Width” measurement.
Handy Tip: You can easily orient your frame to landscape with the 3 L’s: To make a Landscape, the Larger dimension is entered on the Left.
Your art’s orientation is important as this will affect which direction your hanging wire is placed.

Will Any Part Of My Art Be Covered By The Frame? What If My Art Has A Border?
All picture frames generally require some sort of slight overlap (1/4″) to keep your art held in place.
If your art has a border surrounding it that you might not want to be shown in your final frame, you have some options to cover it by adding matting.
To learn more you can dive a little deeper into the 1/4″ overlap that is necessary for picture framing.
Sizing Digital Art

For digital artworks or photographs, you generally won’t have to worry about manually measuring, but there are still some considerations when it comes to sizing.
You can read more about DPI and quality in our post about formatting digital photos, but the most important thing to remember is to always use the highest resolution image possible for the best results.
How To Measure Your Art For Framing: Here at Frame It Easy we will always print your digitally uploaded photos at the highest possible dots per inch for the size that you select.
However, because it is not possible to add detail to a photo after it is taken, the larger you choose to print your photo the blurrier it will look up close. (Think about stretching a standard 4″ by 6″ photo to fit a billboard – it will look great from a couple of hundred feet away but will look very blurry up close.)
You may also notice that our website won’t let you print a photo larger than a certain size – this is to avoid printing something of very low quality.
Final Thoughts
Here are a few things to remember:
- Always consider your orientation and make sure your measurements are in the Width x Height format.
- If you want a landscape, make sure your “Width” measurement is greater.
- If you want a portrait, make sure your “Height” measurement is greater.
- If your art is thicker than ¼”, definitely look for shadow box frames.
- Keep fractional increments on a ruler in mind, and always try to line your artwork up with the closest one.
- For digital art, 300+ DPI is the best quality to print at virtually any size.
Measuring art can be straightforward, but it is also essential that you get it right. We can even break down how to measure picture frame sizes. No worries, we have got you covered. It would be unfortunate if you were unable to frame your art as a result of incorrect measurements, so hopefully, the info above has equipped you to become a measuring master.

